A look back at some of my past favourite gradients! I hope you enjoy. I am on a brief vacation and will not be posting this week. Have a great one!


Pin It Now!
A look back at some of my past favourite gradients! I hope you enjoy. I am on a brief vacation and will not be posting this week. Have a great one!


Here is a quick swatch of China Glaze Tarnished Gold again, this time over one coat of Wet n Wild Black Cream. The result looks a lot better. Win.

Today's gradient Friday is inspired by a dandelion mani I saw on pininterest. I hope you all enjoy!
I used H&M Bella's Choice as my base coat. It is a turquoise blue that has a thicker formula, so you have to be careful when applying to avoid streaks. However, if you use a thick coat, you only need 1 coat for it to be opaque.
Next, I sponged on Misa Dirty, Sexy, Money on the top half of my nail (Swatch and review can be found here.) Lastly, I sponged on nails inc. Electric Teal, a creamy greenish teale color, which was available exclusively for instyle magazine back in June/July.
I drew on my dandelions using Milani Nail Art Brush in black and Sally Hansen White Out with a tiny paintbrush. 3 more GFC followers until giveaway!!


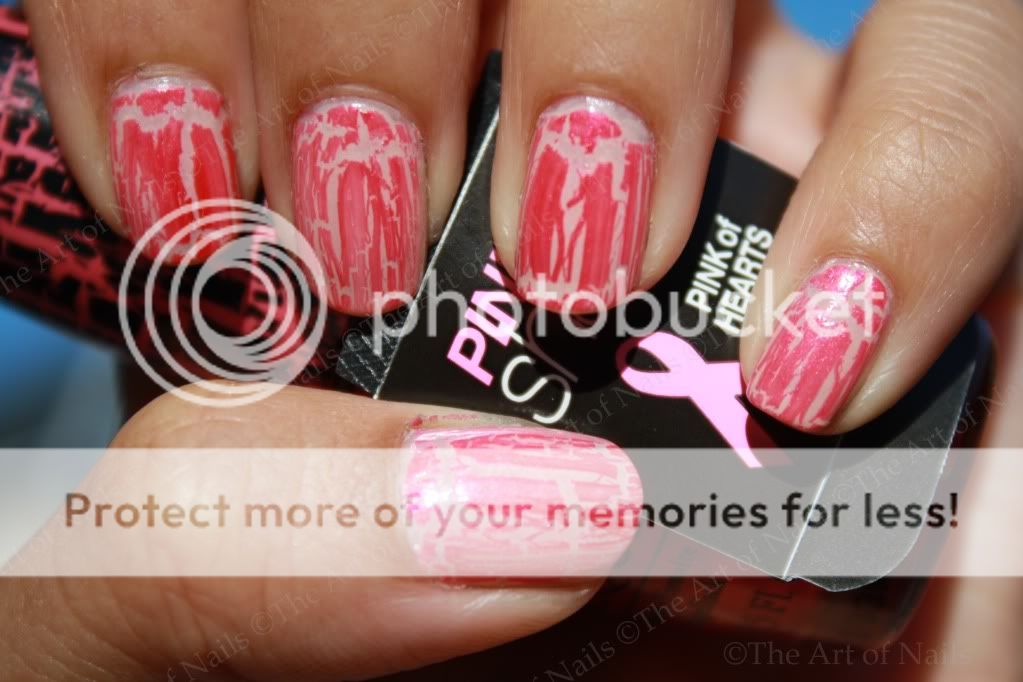
As promised, here is the awaited swatch of OPI Pink Shatter: Pink of Hearts. This limited edition nail lacquer is OPI first pink shatter and each comes with a pink ribbon tag to call attention to breast cancer awareness. OPI will be donating $5000 Rethink Breast Cancer in Canada.
I started off with 3 coats of OPI Canberra’t Without You, a sheer nude color with shimmer. Even after 3 coats it was not completely opaque, but I thought it would be fine as I would be layering pink shatter over it. Next, after I waited for the polish to be dry, I used OPI Pink Shatter on top. I was pleasantly surprised by this formulation. It was a lot more workable and glided on smoother than any of the other OPI Shatters. OPI Pink Shatter is a bright metallic pink crackle, and they really nailed down the formulation. I really love this color and love how this helps raise awareness to breast cancer. This will be available for sale in the months of September and October. See if you can snag yourself a bottle!
OPI Pink Shatter was sent to me for review. All opinions are my own.


When I heard about Milani's One Coat Glitter line, I was very intrigued. Glitter usually takes 3-4 coats to be opaque given the nature of the size of the sparkles and the lack of opacity. Milani Red Sparkle, is a glittery red polish that is packed with glitter. In the first picture, I used a medium coat of the polish, and it covers quite well. However, I still think that it would look better with another coat so the second pictures shows you the polish with 2 coats of polish and a coat of Milani Top Coat. Milani has done really well with what it has promised as one coat of this glitter polish does allow you to get by. It has good opacity and the formulation applied well. The dry time was decent and removal was normal compared to other glitter polishes. I would personally apply two coats just because I think it looks better.
I wanted to try China Glaze metallic nail crackle on top and alternated 2 different colors. On my thumb, middle, and pinky finger is China Glaze Tarnished Gold, a metallic gold crackle. On my index and ring finger is China Glaze Cracked Medallion, a metallic bronze crackle. Although the colors may look similar, Cracked Medallion is noticeably darker and more on the copper side. I think adding these metallic crackles on glitter nail polish are a bit overkill and I will try it on a solid color polish next time. It did allow me to test out the formulation and the crackle effect of these polishes though, and I am a big fan. Like the rest of China Glazes crackle line, I love the way these polishes crackle and I am so glad they were able to transfer the same formulation in the metallic crackle line.
Thanks for reading polish addicts, giveaway coming soon!


Today's gradient Friday features 2 Zoya products I received with my purchase of Zoya Carmen, seen here. I used 2 coats of Zoya Ivanka, a bright shimmery green, as my base coat. Application was smooth, and it was easy to control the brush. Next, I sponged on Zoya Charla, a medium shimmery turquoise, on the top half of my nail to create a subtle gradient. I waited for it to dry then sponged on another coat. Finally, I topped it off with ColorClub Starry Temptress topcoat for addition glitter.
Below are pictures of the gradient in my light box, with flash in my room and a swatch of Zoya Ivanka.


Polish Addicts, you have no idea how giddy I got when I received these babies in the mail. I will spare you all the details and show you the pictures instead and let you decide your giddy level for yourself.
These two new OPI shades will be joining their DS series this upcoming fall. For my review on their other colors in their DS line, click here, here, and here.
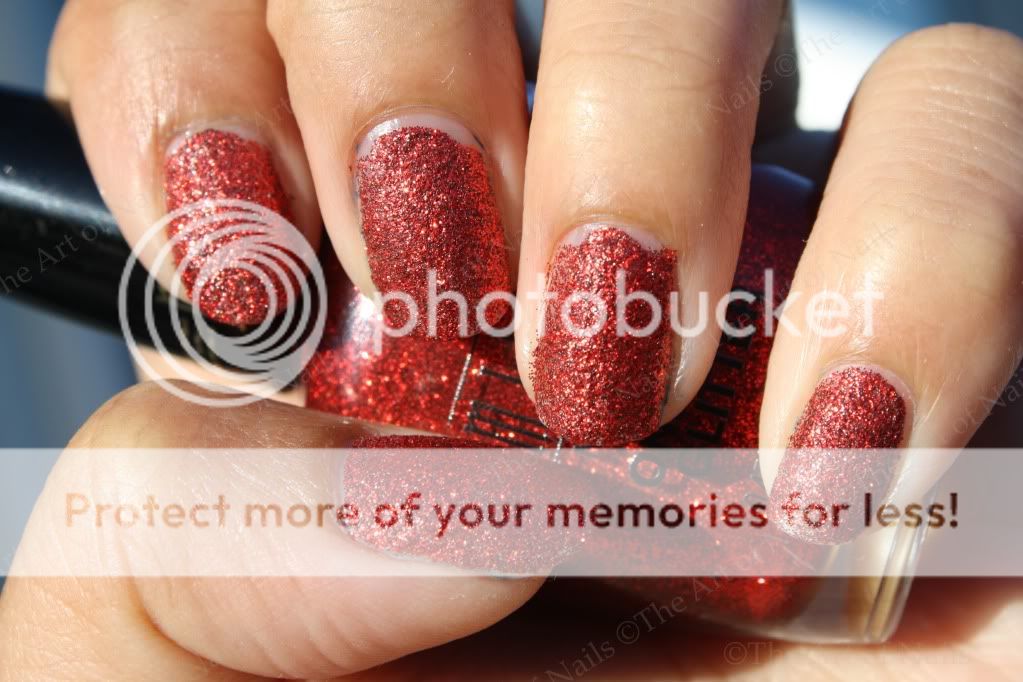
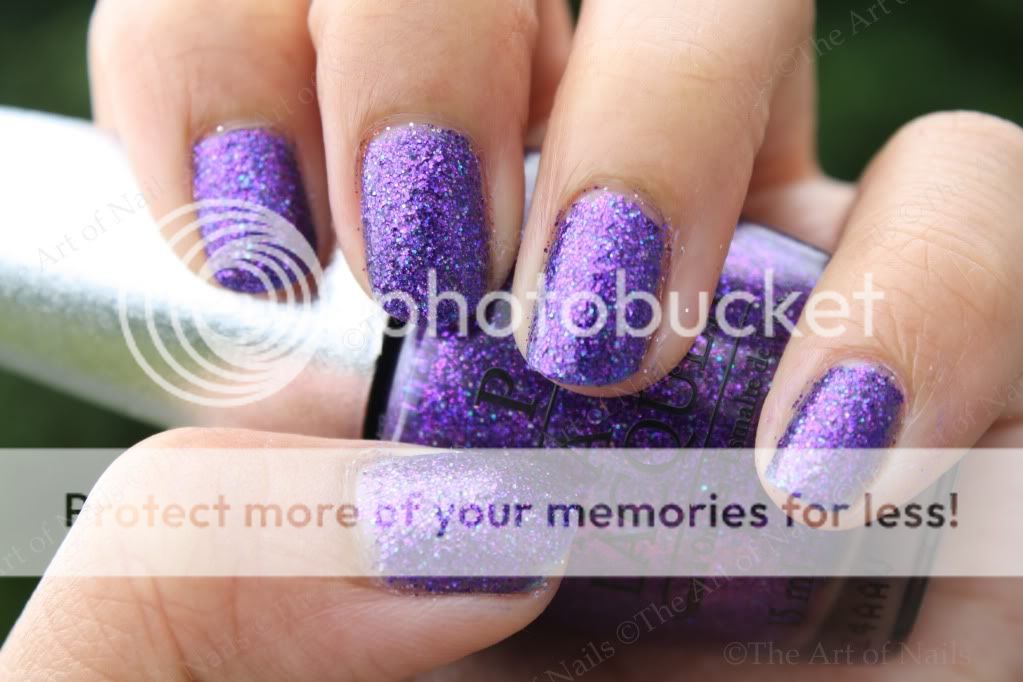
OPI DS Bold is up first. It is a shimmery red packed, and I mean PACKED, with red, silver and pink glitter. This polish leans a little towards pink than red but still very pretty. OPI DS Temptation is a medium purple which is packed with blue, purple, and silver glitter. The pictures do not do this polish justice. My camera keeps picking up on the blue tones way more than the purple. I tried to photograph the bottle instead to give you a more accurate color. It is a brighter purple in person.
Formulation on both of these polishes was good. The glitter is evenly distributed on the nail with their famous ProWide Brush. Both of these polishes require 3 medium coats for the effect to really stand out and be opaque. I used thinner coats when applying Bold and ended up with a little bit of VNL. The dry time was quick so I was happy. Removal was surprisingly hassle-free. The glitter was much easier to remove than most other polishes and it did not stick onto your skin as much. I was pleasantly surprised as I was expecting a small battle.
Some may ask how these 2 polishes compare to the other DS polishes and I would have to tell you that you really are not comparing the same thing. These polishes are not holographic polishes but glitter polishes. They will not have a smooth finish compared to others in the series as the glitter leaves it a bit bumpy, but nothing a top coat will not fix. Compared to other glitter polishes however, these ones are definitely more opaque than most. The closest polishes I have in my stash that are similar to DS Temptation are Sally Hansen Rockstar Pink and Sephora by OPI Too Good For Me. However, neither of these are even close to dupes with both being more on the reddish-purple side.
If OPIs goal was to add two new colors with intense shimmer and unique texture to their DS line, they have done exactly that. These two new polishes are fun, sparkly and glittery. Both are a great addition to my collection.
Stay tune for a review of OPI Pink Shatter, their annual polish which helps raise awareness for breast cancer.
Polishes were sent to me for review. All opinions are my own.


Right before my vacation, some nail packages arrived for me, so here are some of the colors! Milani Bolting Blue describes this color quite well. It is a shimmery royal blue color which applied quite smoothly and was opaque in 2 medium coats. I really liked how this color looked both in the sun and the shadows, so I took a picture displaying that.
Next, on my index and ring fingers, I layered on Milani Jewel FX in Gold. The sequins in this formula just blow me away. It distributes nicely on the nail and it saves me time from having to put sequins on myself individually. Doesn't this look pretty? It's also available in silver and multicolor, which looks like a lot of fun.
On my thumb, middle, and pinky finger, I used China Glaze Platinum Pieces, a silver metallic crackle, and applied a nice even layer on top. There is just no contest for me. China Glaze makes one of the best, if not THE best, crackle polish. This metallic crackle is no different and I love the big chucks and easy application.
Finally, I topped all my fingers off with Milani Top Coats, which gives it a nice shine and the dry time on this was quick as well.
All products in this post was sent to me for review. All opinions are my own.


I am back from Hawaii with an inspired gradient for all of you! The trip was great and I took so many photos. Hopefully I can translate some of my gorgeous photos into nail art for you all. This one is inspired by the colors on the side during the middle phase of sunrise which I got to enjoy in Haleakala National Park at 10000 feet elevation.
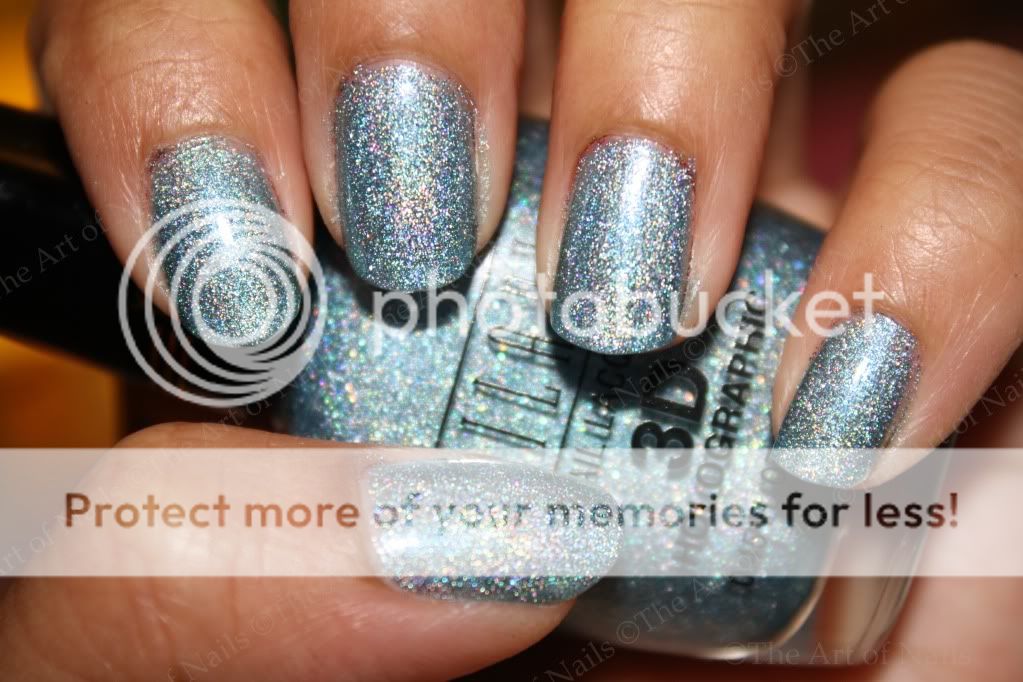
I used Milani 3D Holographic Cyberspace as my base coat. This took 2 medium coats to be opaque but the formulation was smooth. Next I painted Milani 3D Holographic Digital on the top half of my nail and used Wet N Wild Clear Nail Protector to blend it in. I picked up both of these nail polishes in Hawaii as I do not have anything from the 3D Holographic line from Milani.
Finally, for the design, I stamped on a Hawaiian flower using BM16 on my ring finger with Wet N Wild Black Crème. On the rest of the fingers, I painted palm tree leaves using Milani Nail Art in Black Sketch 703. This has to be one of the best nail art brushes I have used thus far. The polish did not overload the brush, it was easy to handle and it painted nice crisp lines. I love this!
Hope you got to enjoy some sun as well Polish Addicts, wherever you all are!
Milani Nail Art Black Sketch was sent to me for review. All opinions are my own.


 Pin It Now!