Friday, July 30, 2010

American Apparel Malibu Green


Here is the other swatch of the nail polish I bought at American Apparel. This color is called Malibu Green. This is a suitable name for this polish as the color reminds me of the greenish-blue waters in Malibu. Like the other polish, this color only required 2 coats for it to be opaque. The application was smooth, but the first coat did have a little more streaks than Mount Royal.

I found that removing this polish was a little stain-y as well, but maybe that's with all green tones. So what do you think? Will you ladies be trying out some American Apparel polishes?

My local H&M now sells nail polish. I picked up one today. Will swatch soon!

Thanks for reading!
Pin It Now!

Thursday, July 29, 2010

Cute Cherries Mani


This is OPI Pink-O De Gallo. Look how sheer this color is. I can see so much nail bed. I'm not a huge fan of sheer polishes, but they do make a good base for French manicures. I'm wearing 3 coats in this picture with a base coat underneath. The application for this polish was smooth and no major problems occurred.


Top: Indoor picture; Bottom: Outdoor picture

I decided to switch it up and take a photograph of my right hand (adventurous eh? ;)) You would not believe how hard it was to hold my camera with my left hand. I really need a tripod. Anyways, I saw a similar design in a nails magazine and decided to recreate it for the summer since cherries are selling everywhere in BC right now. To do this mani, paint a basic French manicure. The base color I used is
OPI Pink-O De Gallo, an
d OPI Alpine Snow for the tips. Afterwards, choose 2 fingers to paint on any fruit of your choice. I would only recommend you to choose 2 nails to paint the fruit on because otherwise it may look a little overwhelming. I chose my index and my fourth finger, but you can chose your thumb and your pinkie or any other combination.

To paint the cherries:
1) Use a dotting tool/toothpick and draw a red circle on one side of your finger. Next, draw another smaller circle right beside the first one. (I used Essie Really Red)
2) Draw a thin black line from the middle of one red circle upwards, repeat for the other and connect tips of black lines together for the stems.
3) Finally, make little green dots at the top of the stems and drag it outwards to make a leaf (I used SkinFood BL002)

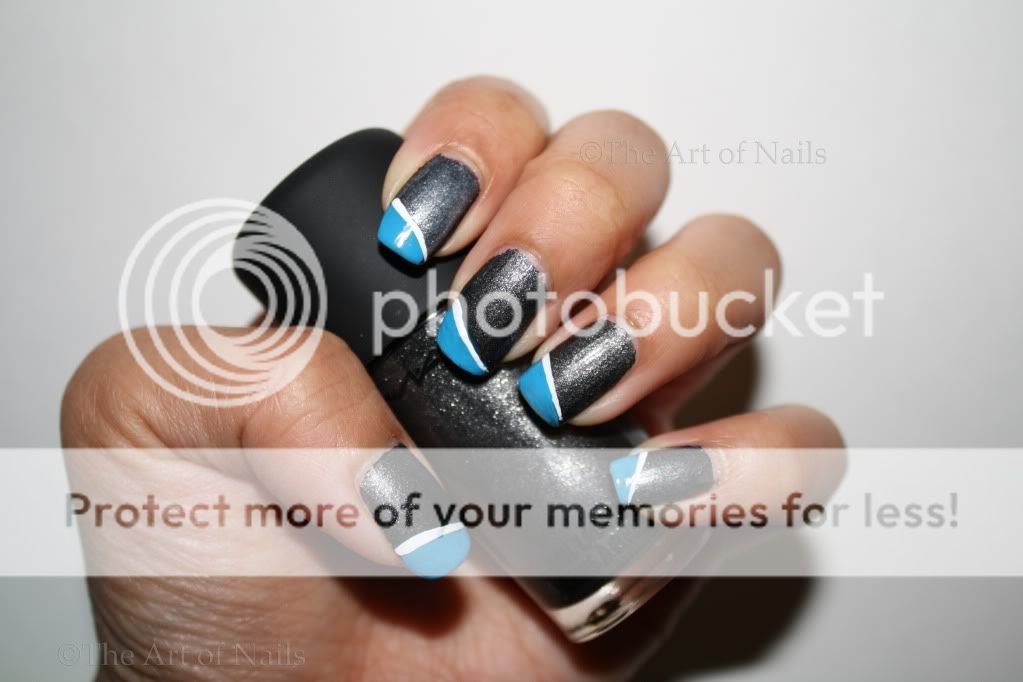
To do the polkadots:
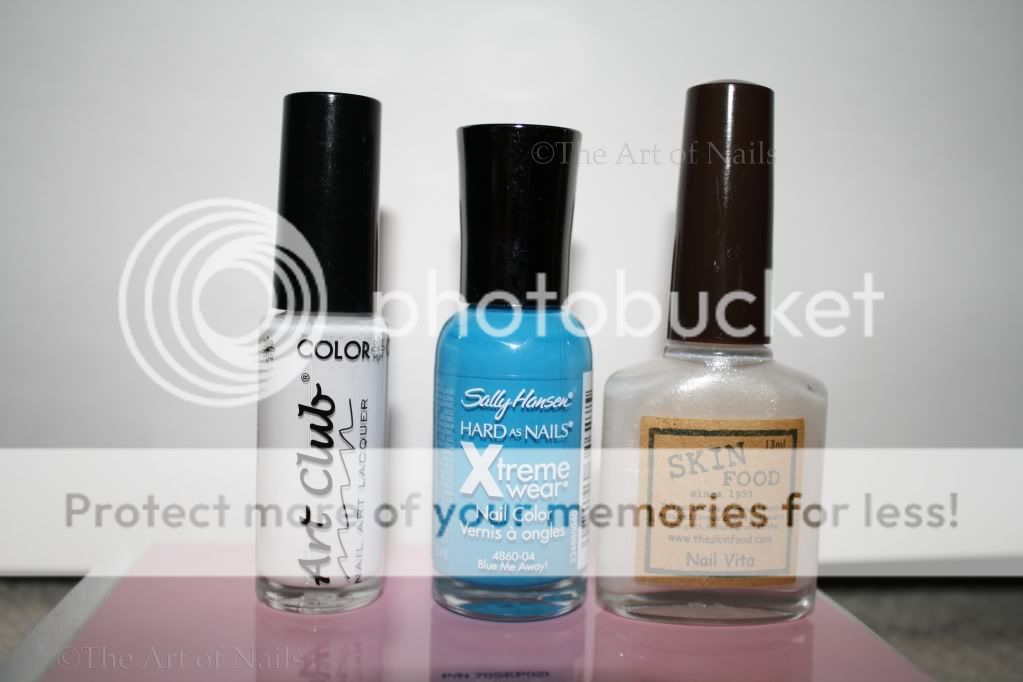
1) Use a dark pink striping tool (ArtClub has nice colors) and draw a line underneath the white tips.
2)Finally, scatter pink dots on top of the white tips and you're done!
3) Finish off with a top coat.

Happy polishing! Thanks for stopping by :)
Pin It Now!

Tuesday, July 27, 2010

American Apparel Mount Royal

As promised, here is the first of two swatches of the polishes that I recently purchased at American Apparel.


This color is called Mount Royal and it is a gorgeous blue cream with a hint of purple. I have a cardigan from H&M that is similar to this color (I digress). The application for this polish was very smooth and although the brush handle is a little longer than the OPI ones, I thought it handled beautifully. In the picture, I am wearing 2 coats with no top coat, and as you can see, it is already opaque and looks so pretty in the sun!

I am actually pleasantly surprised at the quality of the polish because when the words "American Apparel" appear, nail polish is not the first word that pops into mind. All in all, this is definitely a color I would wear again. Pin It Now!

Sunday, July 25, 2010

Summer Fruit Salad!


Here is a summer mani that I did to celebrate the start of summer! I thought of the name because of the colors I chose and my love for fruits! My favorites are strawberries and blueberries :) It was my first time using my dotting tools and I may have had a little too much fun. I still think it still turned out okay, but I could have used fewer dots. 0_o

I used
OPI Banana Bandanna as my base coat and I'm wearing 2 coats. However, I used OPI Alpine Snow first to make the yellow more pastel-y and opaque. Afterwards, I used my dotting tools to add the multicolored dots.


From left to right: OPI Alpine White, OPI Banana Bandanna, OPI Green-Wich Village, OPI Orange You Glad It's Summer?, OPI I'm Indi-a Mood for Love

Hope you are all getting some sun! Cheers!

PS- I finally made it to American Apparel and picked up 2 new shades! Swatches will come soon!
Pin It Now!

Friday, July 23, 2010

Color Accent


Since I already had MAC Military on, I decided to do some nail art on it to make it more fun. I used white, silver, and a popping blue for this nail design. I had a very busy day so I didn't get to take any outdoor pics, sorry! Hopefully the indoor pic will give you a good idea. Here are the colors I used:


From left to right: Art Club striping polish, Sally Hansen Xtreme Wear 04, SKINFOOD

I painted my index finger and pinky with the SkinFood over top Military to give it a little more grey. It's' hard to see in this picture, but it's definitely more noticeable in sunlight. I painted the blue diagonal on each finger and then lined it with the striping polish after.

Hope you enjoyed reading! Thanks for dropping by :)
Pin It Now!

Wednesday, July 21, 2010

MAC Matte Military


Indoor Lighting


Outdoor direct sunlight

As promised, here is the second nail polish I picked up at the MAC counter from their Alice+Olivia line. Did you guess that it would be this one? Because I sure did not! I'm not a huge fan of matte polishes and I really love purples, so my plan was to get the purple and blue polish. However, once I walked in and saw the swatch in person, I instantly fell in love.

Matte Military is my first ever matte polish and if all matte polishes are like this one, I would definitely be willing to try more. The application of this polish was tricky at first because you had to have the right amount of polish on the brush in order for it to not be streaky. However, I got the hang of it, and after 3 coats, there are no streaks to be found! The feel of this on your nail is quite amazing. Although there are micro-glitters in the polish, you cannot feel them at all. It dries super fast and super smooth and I cannot stop touching the top of my nails. I tried removing the polish off as well, and there is no staining to be found (take note Morning After).

If the $14.50 price tag is a bit much for you, the good news is there are close dupes. 2 of the closest I've seen is Nubar Midnight Matte and Orly Iron Butterfly, both of which a slightly lighter.

Exam tomorrow, so I will do some nail art later. Thanks for reading!
Pin It Now!

Tuesday, July 20, 2010

Water Marbling


From left to right: Sephora by OPI Leaf Him at the Altar, OPI Russian Navy

Lots of school stuff going on right now, so I'm going to post a nail design I attempted some time ago. I had watched a youtube clip on water marbling, and I was intrigued to try, so I decided to go for it. I used
JOE Fresh Mint as my base coat. The nail polish line from Joe Fresh is relatively new and I am pleased with the range of color they have. Aside from this color, I picked up 2 other ones as well. These are formulated without the use of formaldehyde, toluene, DBP or camphor. The application of the polish was quite smooth and it is well pigmented. However, the brushes are short and stubby making application a little more difficult, but at $4 a bottle, you really can't go wrong.

Water marbling my nails was quite the experiment. It takes a few tries to get the hang of it, but after you do, it is relatively simple. However, be warned: it's time consuming. I'll post a tutorial soon on how to water marble, but for now I will give you a few tips to make your life easier:

1)Test which nail polishes will work (float and disperse) - most OPIs do
2) Use warm distilled water
3) "Cleanse" your water if you see floating pieces of nail polish after a while (To cleanse: Drop a drop of nail polish and drag it to the sides of the cup, after a few seconds, it should harden and you can use a toothpick and take the whole piece of nail polish out. Voila! Your water is clean again.)
4) Alternate the colors you want until you have around 8-10 rings for best results
5) ) For easy cleanup: tape around your cuticles with scotch tape before you dip your finger in OR cover it with cuticle oil and then wipe off after
*for this mani I taped my around my cuticles, will try with cuticle oil next time*

Water marbling is so unique as you can make each nail look different (or the same if you're really skilled!) while keeping with the same color scheme. I will definitely try this again for a more refined look next time. Until then, thanks for reading!
Pin It Now!

Sunday, July 18, 2010

Ahoy Matey!

It's been a crazy weekend with lots to do as family has come to visit! The nautical nail theme has been quite popular lately, so I decided to have a go at it. I've seen some marvelous designs, some elaborate with great details or some multi-colored ones. However, I wanted something simple but still cute so I opted for this design.

Indoor with sunlight streaming in


Outdoor with sunlight @ the beach


This is similar to the pink french tip I posted early but with a slight variation. I painted the tips blue with a stripe polish, then added 2 white lines near the top of the nail after. I finished it off with CND Effects Sapphire Sparkle to give it a shimmery effect that is similar to when the sun hits the water during the day. To finish off this nail design, you can opt to draw an anchor on one of your fingers. A tutorial for drawing anchors can be found at my friend's site here. I just drew mine freehand and added a jewel at the top.

The blue tips needed 2 coats, but I think 1 coat would do if you had a more opaque polish. One trick I learned to paint tips that I will share with you here:
1) Take the brush and hold it vertically near the tips of your nail
2) Start on left side of your nail
3) Rotate your FINGER left to right while holding your brush in the same spot
*This example is for painting your left hand, do the opposite for steps 2 and 3 when painting your right hand*

All done! :) You'll be surprised how straight it comes out and how easy it is to do. Hope this helps! Thanks for reading!

PS- starting from today's post when you click on the image, it'll appear bigger in a separate window
Pin It Now!

Friday, July 16, 2010

OPI Got a Date To-Knight!


Outdoor Direct Sunlight


Indoor lighting


I had some time yesterday, so I decided to do some nail art! The color I used for my base is OPI Got A Date To-Knight. The application of this polish was smooth like other OPI polishes, however this color was a lot more sheer than I thought. I am wearing 4 coats in the pictures and I can still see my nail bed if I look closely.

Here are the polishes I used for my nail art:


From left to right: Got A Date To-Knight, Shiseido Integrate RS361, Silver striping polish

I used 2 coats of Integrate RS361 down the side of the nail, then lined them each side with my silver polish (I didn't have silver nail ribbon) and stuck nail jewels on after.

Shiseido Integrate RS 361 is the more affordable line of makeup from Shiseido. I had bought this the last time I was in Japan but didn't get to use it until now. The formulation surprised me because it was very smooth. The brush was surprisingly soft and the nail polish was quite pigmented in glitter. This line has 19 different colors consisting of either glitter or pearlescent shimmer. It is designed to be quick drying and this proved to be true. Click here to see the collection.

Sidenote: I took off MAC Morning.After yesterday, and I found it to be quite stain-y. My hand were dyed slightly blue and I couldn't take it all off. Does this happen to any of you?

That's all for today! Thanks for visiting!
Pin It Now!

Thursday, July 15, 2010

MAC Alice+Olivia Morning.After


MAC's new Alice+Olivia collection came out last week, and when I saw swatches for Morning.After I knew I had to go pick it up. I arrived at a MAC kiosk inside The Bay late in the afternoon, only to be told that it is only carried by MAC stores. Thankfully, there was one inside the mall, and I ran in to pick it up. The salesperson there had swatched all three colors of their collection on her nail, and I fell in love with another one in the collection (Can you guess? Swatches will come later). !

Morning.After is a beautiful blue-green color and you can definitely tell that it has a greener base than most turquoise polishes, so I would say it leans more towards a teal color. The application was smooth and it was very easy to handle. In the pictures, I am using 3 coats, and it took that many coats to be truly opaque. I am very pleased with this MAC polish, as I've had some in the past that were more difficult to apply, and having cute packaging is a bonus!

While I was browsing some other nail blogs, I happened across the weekly challenge at Polish Hoarder Disorder. This week challenge was to make a mani inspired by a Betsey Johnson Dress. I've always loved their dresses because of their cute design and had a hard time choosing what I should do. I got a lot of new ideas for nail designs from some of them but in the end I submitted this entry:


For this mani I used:


From left to right: OPI Black Onyx, MAC Morning.After, Konad White

Just for fun I also did another design on my Konad plate M57-


Thanks for reading!
Pin It Now!