
Here is my first tutorial on how to do water marbling on your nails, enjoy!
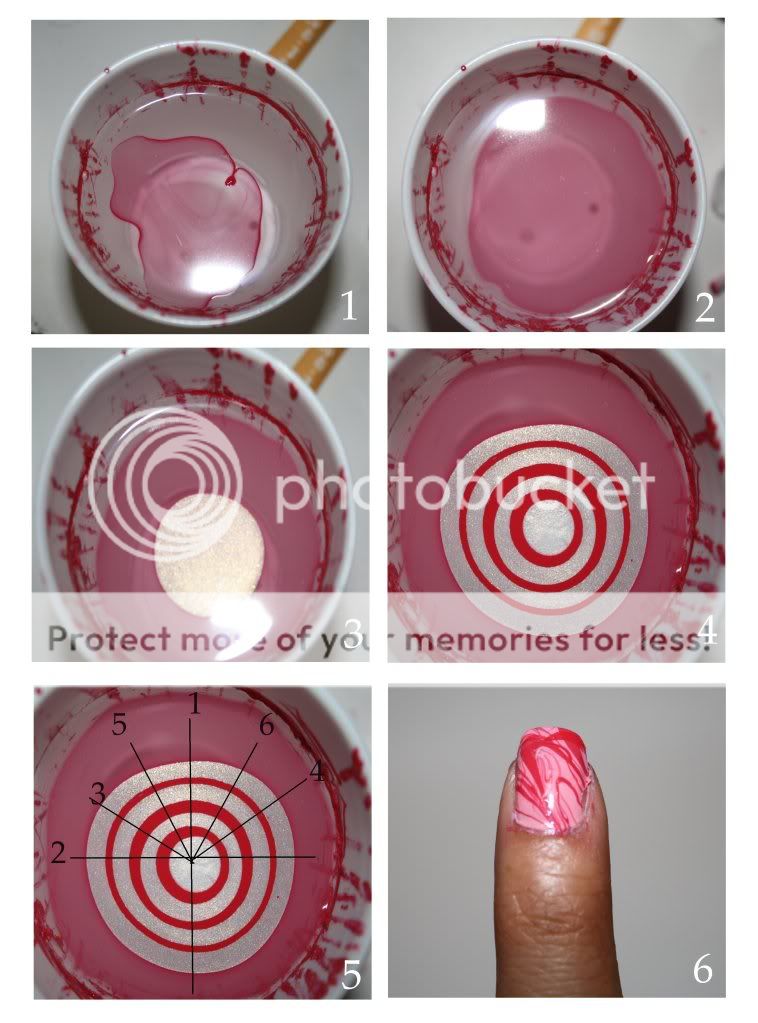
2) Now you are ready to form your rings- make sure the caps on your polishes are loose as you have to do the following steps quickly. Start with one color and let a droplet fall close to the top of the water
3) Next, using you other color, let the droplet fall in the centre of the first circle (the bullseye of the circle)
4) Continue building your rings until you have at least 8, alternating colors every time
5) Using your orange stick/toothpick, follow the numbered lines and drag the polish from top to bottom or left to right
6) Find a design that you want on your nail, and gently, with the nail facing downwards, dip your nail in at a slight angle, pull it out and now the design is on your nail! Congratulations, now you are done 1 nail. Repeat steps 1-6 for the rest of your nails.
Tips:
After each nail, twirl your toothpick/orange stick around the edge of your cup to pick up the rest of the nail polish and wipe it off on a paper towel.
If floaty-bits are beginning to surface, let a droplet of nail polish fall, pull it out to the sides of the cup with your toothpick, and wait for a minute. Then twirl your toothpick to pick up the layer of nail polish, and voilà, your surface is clean again.
For my manicure, I used Essie mini how high as my base, and OPI She's Golden and JOE Fresh Berry for my marbling.
You can see the finish manicure here. Hope this helps, feel free to ask me any questions! Thanks for reading :)
Pin It Now!
That looks great! I've tried marbling 2x with big fat FAILS. I just need to let it go and try again. Thanks for posting this tutorial.
ReplyDelete@ Megan: no problem! practice makes perfect :D
ReplyDeletethis has got to be the coolest nails in the world.
ReplyDelete