Friday, April 29, 2011

Shatter gradient

Today's Friday gradient is made up of the new colors from the OPI Pirates of the Caribbean line. I used Steady as She Rose, Mermaid's Tears, and Planks a Lot. Afterwards, I tried out OPI Silver Shatter but it is hard to tell the effect over light colors so I will use it over bolder colors soon. I alternated with OPI Black Shatter to show you the shatter difference. The shatter is finer in their black color. So far, I love the formulation and coverage of the polishes from this line...I think I may pick up the last 2 colors.

Polish more soon polish addicts!


Pin It Now!

Thursday, April 28, 2011

Sprinkles and icing

Today I have some yummy nails that my friend showed me a picture of and told me I should try. So here is my attempt at it!

I used two coats of Goldie 02, a light mauve pink as my base coat. Goldie is a new brand I have come across recently. They are advertised to be 3-Free and Vegan friendly. Their formulation is a bit runny and the brush is a little longer than I would have liked, but the color is very pretty and drying time was decent. Sorry about my swatch for the color! I almost forgot to take a picture and started drawing my icing already.

I used Sephora by OPI Dating the Drummer, a shimmery brown, as my icing. For my sprinkles, I used SkinFood PK004, Sally Hansen White On, and OPI What's with the Cattitude?

I have cut down my nails to nubbins for my dodgeball playoffs this week. So you will have to bear with me! Thanks for reading.


Pin It Now!

Tuesday, April 26, 2011

OPI Pirates of the Caribbean

I got a call this morning informing me that the new OPI Pirates of the Caribbean line was in so I made a trip to my local beauty supplier store and got my hands on a few of the colors and a much coveted SILVER shatter (it was the last one!) I will swatch them soon and use them all somehow in a design. It is the first time I have loved every single color in a collection...maybe I should buy the last 2 colors with the remainder of my birthday money. You decide for me Polish Addicts! Tell me in your comments if I should also pick up Sparrow me the Drama and Skulls & Glossbones.

From left to right: Stranger Tides, Steady as She Rose, Silver Shatter, Planks a Lot, Mermaid's Tears

Pin It Now!

Monday, April 25, 2011

Electra Magenta

Polish Addicts, here is a quick swatch today on China Glaze Electra Magenta from their Tronica line. It is a very pretty medium purple holographic polish. Do not use a base coat for this one as it does become streaky and harder to apply. I sandwiched 2 coats of Electra Magenta with Seche Vite and it worked well with very minimal tip wear.


Pin It Now!

Friday, April 22, 2011

Tronica Gradient

This gradient was inspired by dying Easter eggs! I used 3 different polished from the China Glaze Tronica line for this mani. I have heard great things about water marbling with these polishes and I will try it next. For this mani, I used 2 coats of Hyper Haute, a gorgeous deep pink holographic color as my base case and it applied wonderfully. Next, I sponged on Electra Magenta, a medium holographic purple, which blended nicely in. Finally, I contrasted the gradient with Techno Teal. Have a great Easter weekend Polish Addicts!


Pin It Now!

Tuesday, April 19, 2011

Easter Mashup

Hello Polish Addicts! Sorry for the last of post these couple of days. It has been a busy weekend filled with birthday celebrations. Here is Easter scotch tape manicure I did using colors I thought reminded me of Easter.

I started out with 2 coats of OPI Whats with the cattitude? I found this polish a little on the streaky side but I didnt mind too much since I was going to cover it up. Next I used OPI Done out in Deco for a mini triangle and finally finished it off with China Glaze Something Sweet for my final triangle.

For added fun, I lined the triangles with some clear silver sparkle polish. Do you have any Easter nail designs you are going to try out? I would love to see them!


Pin It Now!

Friday, April 15, 2011

Party Gradient

This manicure is pretty blinding in the sun. I was a bit distracted while looking at it. I used Seche Vite Nail Lacquer in White as my base coat. The formulation for this was a little hard to work with and was a bit streaky. It took 3 coats to be opaque. Next I sponged on Wet n' Wild Kaleidoscope, which is a gorgeous multicoloured silvery sparkle, for my gradient effect. I sponged on 2 coats and pressed harder near the tips.

Finally, I topped it all off with some nail jewels and Seche Vite top coat. Have a nice weekend polish addicts!


Pin It Now!

Wednesday, April 13, 2011

Stripes of Purple

When I first heard about Justin Bieber collaborating with Nicole by OPI, I rolled my eyes. It is a great marketing scheme and I knew they would sell but I did not foresee myself buying any. Unfortunately, when swatches started appearing online, I fell in love with a couple of the colors. I debated for a long time whether I could justify buying it, but when it was on sale and some proceeds went to Pencils of Promise, I justified it and went to buy them.

I'm a Belieber is a very pretty cream purple. It is perfect for spring and fits nicely into my purple collection. It applied smoothly and was opaque in 2 normal/thick coats.

I decided to stripe my nails with 2 colors that I thought would look nice and also give an idea of how it compares to other purples.

For my middle stripe, I used Dr.'s Remedy Vigor Violet. It is a pretty violet color that has a stronger blue undertone. It applied smoothly and I only used a coat for my design.

Lastly, I used OPI Done out in Deco for my last stripe and sealed it all with my Seche Vite top coat.

Thanks for reading and have a great day polish addicts!

PS- I need a new light for my light box...any suggestions?


Pin It Now!

Monday, April 11, 2011

Newspaper blues

Astor Fash'n Studio 29 is a nail polish my sister picked up for me when she went to Germany. It is a really pretty jelly blue and I really liked the color. The formulation was not the best however. It was very streaky and it took 3 thick coats to cover up most of the streaks and make it opaque. The brush also dragged the polish when I was applying it, making application even more difficult. The color is undeniably gorgeous though.

The next day, I tried the newspaper nail technique I have been reading so much about. It showed up better in pictures than it did on my nail. I kind of like this. Next time I will try using a darker ink print newspaper to see if the results will come out better.

That is it for today polish addicts! Swatch more soon.


Pin It Now!

Friday, April 8, 2011

Duo Color Gradient Friday

Polish Addicts, it is another gradient Friday! By request, today's gradient colors are red and grey. Those are not usually colors I pair together, but I am glad someone requested it. I like the finished result. I used a additional sparkly red coat on top of my fourth and fifth finger just so you could see how it looks with sparkles.

I used JOE Wine as my base color. It is a really nice brighter wine color red and applied quite smoothly. Their brushes still take some time getting used to but it is not that bad. Drying time on this polish was good. I am wearing one coat and it gives pretty good coverage. However, if I were to wear this color alone, I would definitely use 2 coats.

I used OPI Lucerne-tainly look Marvellous for the gradient. I guess I would categorize this more of a dark silver rather than a dark grey, but I liked the color combination.


Pin It Now!

Thursday, April 7, 2011

Feather Mani Tutorial

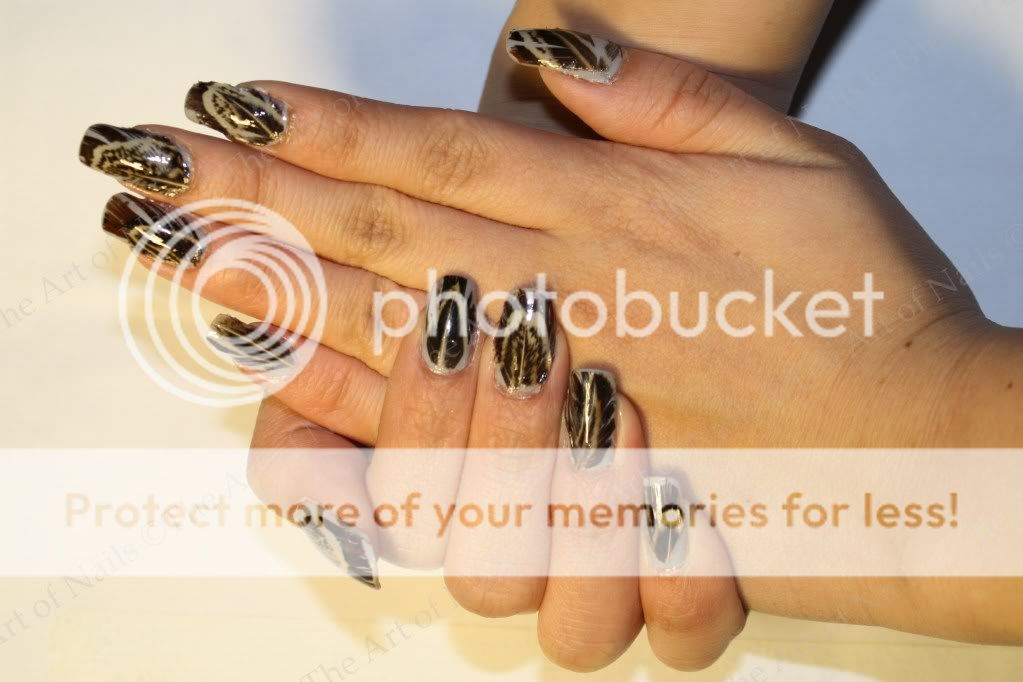
Polish addicts, as promised, here is the short tutorial of how to feather your nails!

Prep: Loose feather bundle (can be purchased at any art store), cuticle trimmers/nail clippers, orange stick, base color and thick clear top coat

Step 1: Paint your nails with a base color that is pretty opaque and matches with your feather colors. I used 2 coats of China Glaze Pelican Gray.

Step 2: Put on a coat of top coat and quickly BEFORE it dries, put on a feather and push it down with an orange stick.

Tip: If your feather is much too big, cut it down a bit before sticking it onto your nail.

Step 3: Using your cuticle trimmer/nail clipper, trim off the excess feathers. Try and trim as closely to the nail as you can. However if this is not easily done, trim it shorter/slimmer than your nail so no feathers will stick out and more of your base color will show.

Step 4: Top with 2 coats of clear top coat and you are finished! It will make the feather nice and shiny and your nails super smooth.

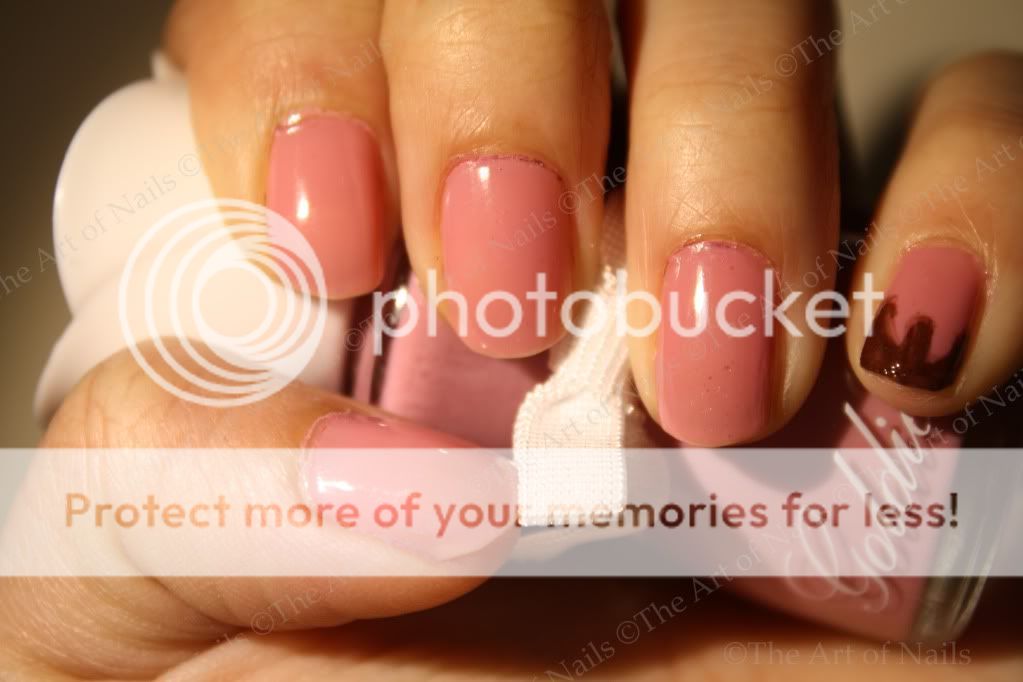
Sidenote: These tutorial pictures were taken after I cut my nails down a bit as I chipped one of them L But it goes to show that feathering your nails work on both long and shorter nails!

Hope this tutorial helped! Post a link to your picture if you decided to attempt this Polish Addicts! I would love to see all your designs! Click to enlarge picture!

Pin It Now!

Tuesday, April 5, 2011

Feathered Mani

I saw this on a couple blogs and decided to try it out myself because it looked so awesome. The feathering process was easier than I thought it would be and the results turned out pretty well.

To feather your nails, you need a good top coat, some feathers, and a base coat. I used China Glaze Pelican Gray as my base coat. The formulation was smooth and easy to handle. I love the color and it was opaque in 2 coats. This is the first time I have taken a picture of both hands so you could see the full effect. Having statement nails like these can really dress up an outfit and brings some fun and style into everyday clothes!

I will do a tutorial on this soon. I still need to edit and it takes me awhile. Write more soon polish addicts!


Pin It Now!

Saturday, April 2, 2011

Belated Blue Gradient Friday

Polish addicts, sorry that gradient Friday's post is a day late! I was super busy yesterday and did not have to come home and post. Today’s gradient is done by request of a reader. It is a blue/aqua gradient using another of the Beauty World gradient sets. I love the colors of this set and both the dark and medium colors were more pigmented than the other sets that I have tried. However, I found the darker blue of this set a little less blendable than the pink set. This gradient reminds me of a mermaid and the ocean...

As always, leave any gradient color requests in the comments! Have a spectacular day.

PS- RBL is having their BIB pre-order on right through this weekend! Grab the colors before they go again!

Pin It Now!